
Dog Leash Hardware Check: Clip, Webbing, Handle, and Backup
On this page
Quick answer
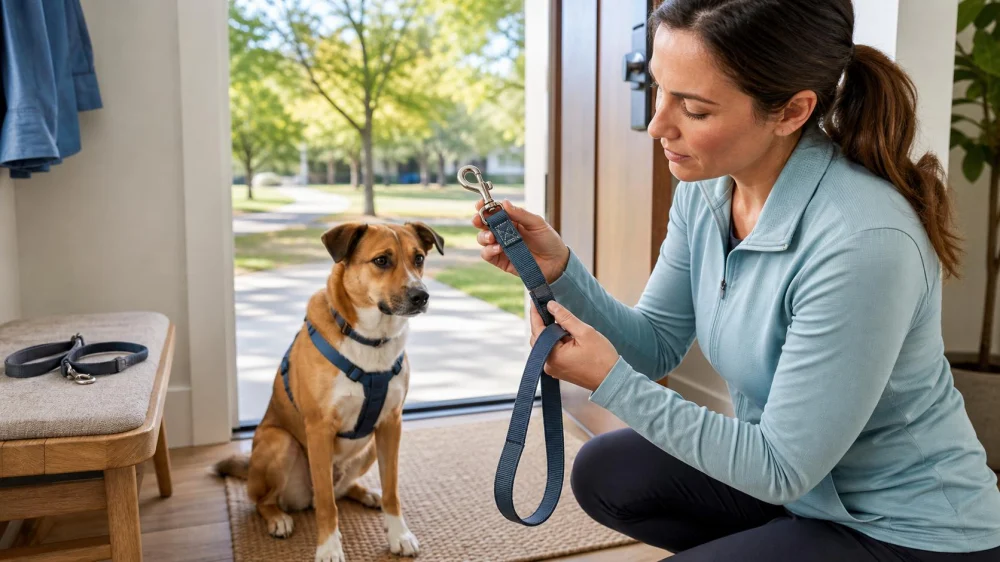
Before every walk, close and open the leash clip, check that its gate fully seats, and inspect the swivel, ring, webbing or rope, stitching, knots, handle, adjusters, reflective strips, and any shock-absorbing or retracting parts. Replace the leash if hardware is cracked, bent, loose, corroded, sticky, or sharp, or if material is frayed, cut, chewed, melted, stiff, stretched, or separating.
Attach the leash to a correctly fitted collar or harness selected for the dog and situation. Carry an accessible backup leash and current identification. Do not repair load-bearing damage with household tape, a decorative knot, or an untested clip.
Pet Supplies Plus Lexington
LexingtonFayette CountyKentucky
4101 Tates Creek Centre Dr Suite 130, Lexington, KY 40517, USA
Inspect the clip and swivel
Operate the snap several times away from the dog. The gate should open smoothly, return fully, and sit squarely without a gap. Dirt, hair, sand, ice, or rust can keep a spring clip from closing.
Check the metal body for cracks, bending, worn edges, deep scratches, plating loss, and corrosion. Rotate the swivel under light hand tension. It should not pull apart, wobble excessively, or expose a sharp edge.
After attachment, visually confirm the clip went through the intended D-ring and closed around it. Long fur can hide a partial connection. Do not clip to a tag ring, decorative loop, zipper pull, or fabric not designed to bear leash force.
Check webbing, rope, and seams
Run your hands slowly along the leash while looking at both sides. Stop for broken fibers, narrowing, fuzzing, flat spots, chew marks, cuts, burns, chemical damage, stiffness, discoloration, or a section that feels thinner.
Inspect every stitched box, bar tack, splice, and folded end. Loose threads alone may be cosmetic, but opening seams, shifted layers, or missing stitches at a load point require replacement or manufacturer assessment.
Rinse and dry only according to care instructions. Heat, bleach, solvents, oils, and prolonged sun can weaken some materials. A clean-looking leash can still be damaged internally after a hard pull, vehicle door closure, or chewing.
Test the handle and length control
Check that the handle loop is fully stitched and comfortable without being so large that it slips easily. Do not wrap the leash around a wrist, hand, finger, or body; a sudden pull can tighten it and cause injury.
Inspect traffic handles, sliding rings, adjustment buckles, couplers, and waist-belt connections. Locking parts must hold their position under the manufacturer's test method without pinching or releasing unexpectedly.
Choose a length that lets the handler maintain control without constant tension. Extra loops should not drag, tangle legs, catch bicycle wheels, or cross a sidewalk.
Review retractable and multi-part leashes
For a retractable leash, inspect the housing, tape or cord, exit guide, clip, lock, brake, and retraction. Stop use if the line hesitates, frays, twists, will not lock, retracts unpredictably, or exposes internal parts.
Never grab a moving retractable cord or tape with bare hands. Keep it away from legs, people, animals, wheels, doors, and traffic. The extended range can allow a dog to reach a hazard before the handler can respond.
For splitters, hands-free belts, double-ended leashes, and car restraints, inspect every connection. More components create more potential release points. Vehicle restraint products require their own crash-safety and manufacturer guidance; an ordinary walking leash is not a vehicle restraint.
Match the leash to the dog and setting
Consider the dog's size, strength, gait, training, reactivity, mobility, chewing, coat, and health, plus handler strength and balance. A lightweight clip may be unsuitable for a powerful dog, while oversized heavy hardware can strike or burden a tiny dog.
Use shorter control near streets, crowded entrances, wildlife, children, livestock, other dogs, and narrow paths. Long lines belong in suitable open spaces with training and awareness of local leash rules.
Ask a veterinarian about equipment for pain, neck, spine, airway, skin, mobility, or recovery concerns. Ask a qualified reward-based trainer for handling and behavior needs. Equipment does not replace training or environmental distance.
Build a walk backup plan
Carry a simple fixed-length backup leash that fits the dog's primary attachment point. Store it where it can be reached without opening a vehicle trunk beside traffic or letting go of the dog.
If the main leash fails, move away from traffic and triggers, secure the dog using the backup only if it can be done without chasing or grabbing near the mouth, and end the walk. Do not continue with a knotted broken leash.
Keep identification and microchip contacts current. Practice calm equipment changes at home so the handler and dog do not learn the process during an emergency.
Frequently asked questions
How often should I replace a dog leash?
There is no universal calendar. Replace it when inspection, use history, care instructions, or manufacturer guidance indicates damage or loss of function.
Can I lubricate a sticky leash clip?
Follow the manufacturer. An unsuitable product can attract grit, contact the dog's skin, or mask internal failure. Replace uncertain hardware.
Is a carabiner safer than a leash snap?
Only if it is designed, rated, sized, and used for the application. A decorative carabiner or key clip is not a leash safety upgrade.
Can I tie a leash after the clip breaks?
Do not rely on an improvised knot around a collar or harness. Use the backup leash and replace the damaged equipment.
Should I use two leashes?
Some dogs and settings benefit from redundant attachments, but poor setup can tangle or load equipment incorrectly. Ask a qualified professional for the specific dog.
Safety limits and professional help
This checklist cannot certify strength, predict failure, select medical equipment, or guarantee control. Follow product instructions, weight and use limits, local leash laws, and the dog's individualized veterinary and training plan.
Seek urgent veterinary care after a leash-related injury, breathing difficulty, collapse, severe pain, neck trauma, or another emergency. Replace equipment involved in a major impact unless the manufacturer confirms it remains serviceable.
Next steps
Place the leash under bright light and inspect it from clip to handle. Open the gate ten times, bend every stitched joint, and mark any questionable area. Put a fixed backup leash by the walking kit, verify the dog's ID, and replace damaged equipment before the next outing.

 Franklin Animal Clinic4.0 (841 reviews)
 101 SPAY & NEUTER OF SCOTTSDALE4.0 (9 reviews)
 Grants Lick Veterinary Hospital4.0 (538 reviews)
 Avalon Pet Wellness Clinic4.0 (325 reviews)
 Hartland Park Animal Hospital4.0 (201 reviews)
 Veterinary Acupuncture and Alternative Medicine in Phoenix5.0 (30 reviews)
 How to Turn a Pet Health Obsessed Owner Into an Informed Owner
 How to Teach Dogs to Relax on Cue – Effective Techniques
 Best Puppy Supplements for Growth and Immunity | Pet & Puppy
 Ear Infections in Dogs: Prevention, Treatment, and Aftercare
 Why Do Dogs Flick Their Ears When Listening? Meaning Explained
 What to Ask Before Boarding Your Pet: Vet & Staff Questions | Pet & Puppy